Homemade Girl Scout Cookies: Smooth Operator Tagalongs®

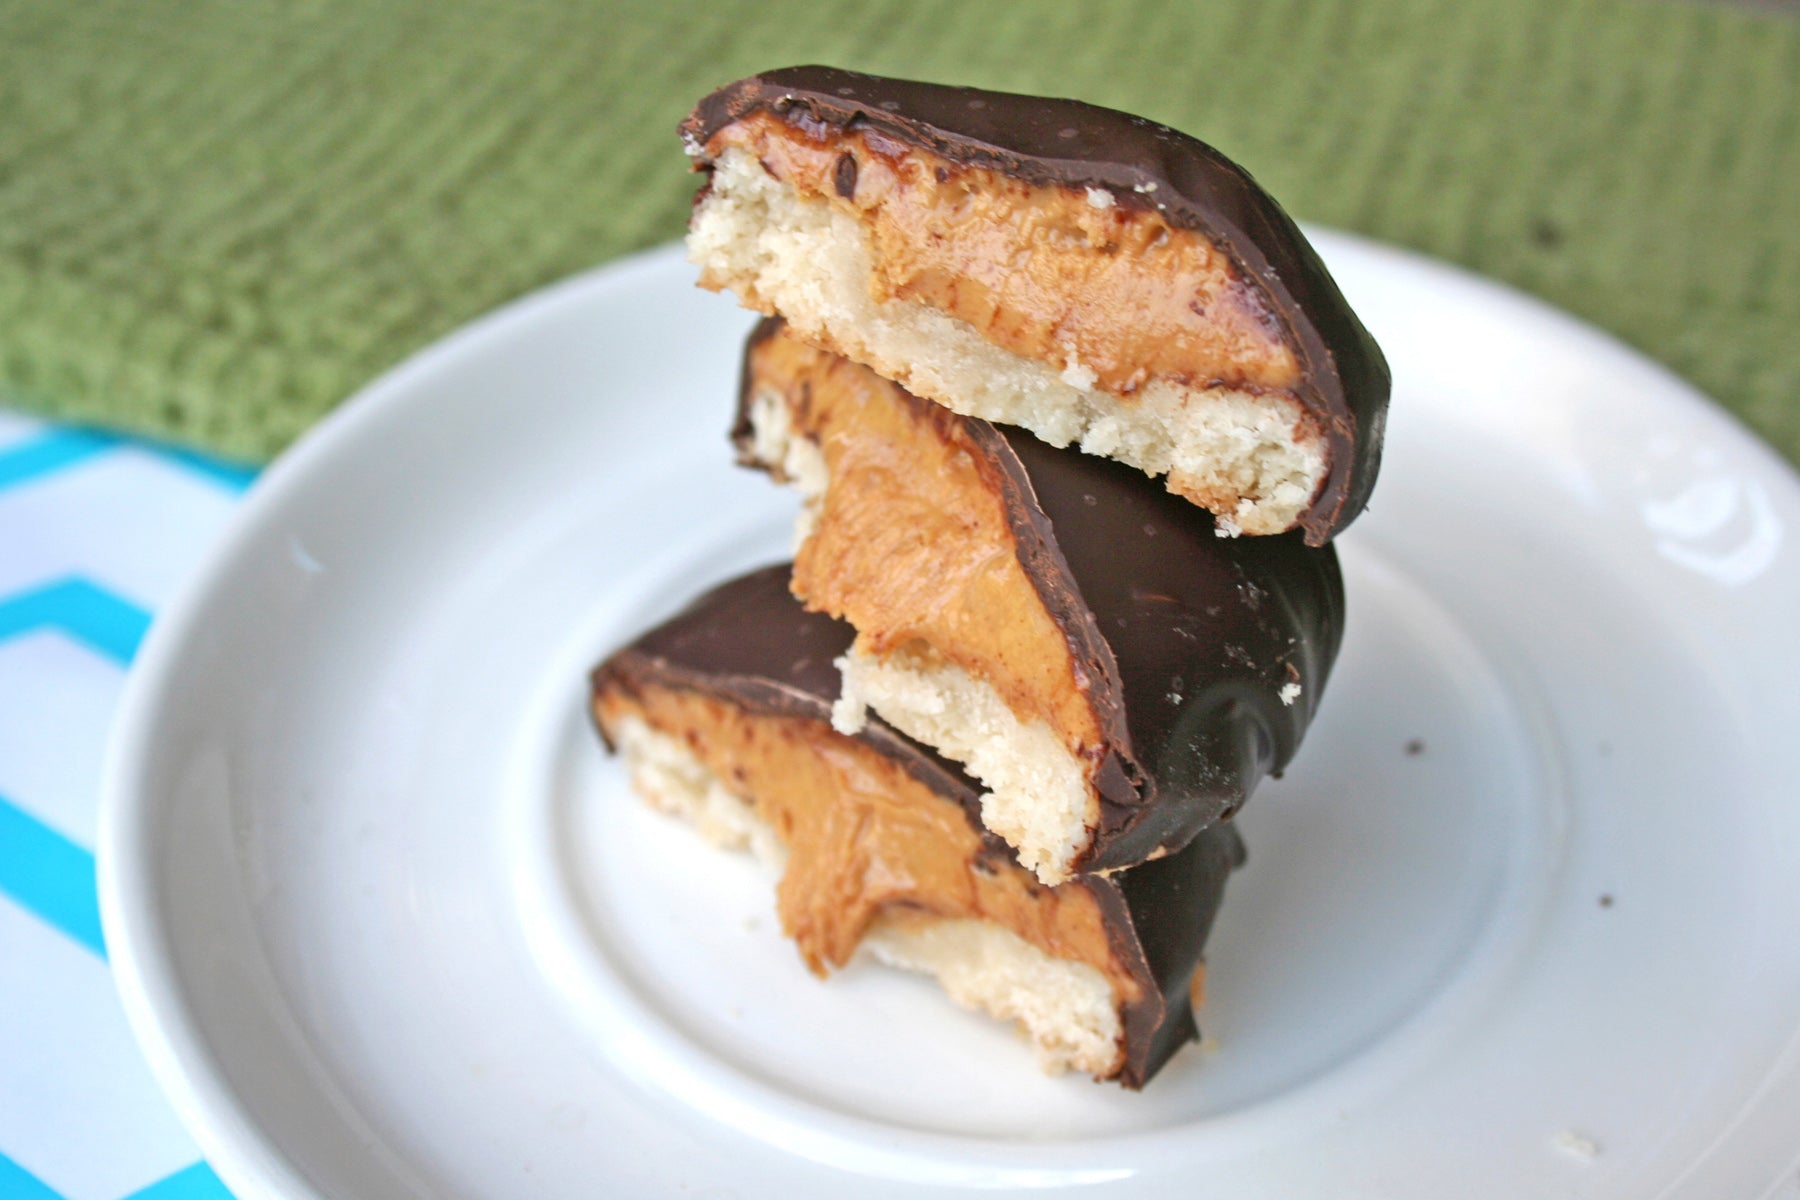
Ready to win your merit badge for deliciousness? It’s time to whip up a batch of homemade Tagalongs® cookies. Inspired by the beloved Girl Scout cookie (also known in some parts as Peanut Butter Patties®), these cookies start with a tender shortbread base, which is then piled high with a sweet Peanut Butter & Co. Smooth Operator and then completely enrobed in chocolate.
Once finished, the cookies might look like jumbo chocolate truffles from the outside, but one bite reveals the magical mélange of cookie and peanut butter contained within. Go ahead, serve them to all of your friends: you’re bound to bring on some sweet nostalgia and satisfy some serious sweet tooth cravings!
- Yield:30 cookies
- Prep Time:45 minutes (plus 2 hours chilling)
- Cook Time:35 minutes
- Total Time:3 hours and 25 minutes
Ingredients
For the cookies
2 cups flour, sifted
1/2 teaspoon salt
1 cup (2 sticks) unsalted butter, softened
1/2 cup granulated sugar
1 teaspoon vanilla extract
2 tablespoons milk or cream
For the filling
1 jar (16 ounces) Peanut Butter & Co. Smooth Operator, at room temperature
3/4 cup confectioners’ sugar, sifted
1/2 teaspoon vanilla extract
For the topping
12 ounces good quality milk or semisweet chocolate, coarsely chopped
1 tablespoon unsalted butter
Directions
Prepare the cookies. Do not preheat the oven yet, as you’ll have to let the dough chill. In a medium bowl, sift together the flour and salt. Set to the side for the moment.
In the bowl of a stand mixer fitted with the paddle attachment, cream the butter and sugar until light and fluffy, 2-3 minutes on medium-high speed. Pause to scrape down the sides of the bowl as needed. Stir in the vanilla.
Add the flour mixture to the buttery mixture, mixing on low and scraping down the sides of the bowl occasionally. The mixture will start out very crumbly but will begin to come together after a few moments.
Add the first tablespoon of milk or cream. You just want to add enough to moisten the dough so that it comes together, so you may not need the second tablespoon.
Form the dough into two logs about 1.5 inches in diameter (it’s easier to handle in two portions rather than one long one). Wrap tightly in plastic wrap, and refrigerate for 2-3 hours, or until quite firm.
Near the end of your chilling period, position two racks in the middle of your oven. Preheat the oven to 350°F, and line two baking sheets with parchment paper.
Remove the dough from the refrigerator, and slice into coins somewhere around 1/3 to 1/2 inch thick each.
Place the rounds of dough on the prepared cookie sheets, leaving about an inch between cookies (they will spread a little bit, but not too much).
Bake for 10-12 minutes, or until they have a dull finish on top and are just golden on the edges. They are supposed to be a fairly soft cookie.
Remove from oven and let cool for a minute or two on the sheet. As soon as they are not too hot, use either your thumb or the back of a small spoon to make an indent in the center of the cookie. You’re making a little well so that you can fit even more peanut butter filling inside. Don’t wait too long to do this, as the cookies will firm as they cool and can crack if you don’t do it while the cookies are still very soft and flexible.
After a couple more minutes on the baking sheets, transfer the cookies to wire racks and let cool completely. But don’t clean up the baking sheets: you can use them again to chill the cookies in step 13.
While the cookies cool, you can prepare the filling. In the bowl of a stand mixer fitted with the paddle attachment, cream the Peanut Butter & Co. Smooth Operator and confectioners’ sugar until smooth and combined. Stir in the vanilla. The texture will be a little thicker than plain peanut butter, but not by much.
Spoon about 1/2 tablespoon of the peanut butter on the center of each cookie. It’s OK if it mounds a little bit. Once all of the cookies are topped, put them in the freezer for about 20 minutes. This will help the peanut butter topping firm, so that they are easier to coat in chocolate.
Prepare your chocolate topping. In the top of a double boiler or in the microwave, melt the chocolate and butter. Once melted, stir to make sure it’s totally combined.
Remove the cookies from the freezer, one tray at a time, and dip them in the chocolate mixture. My method? Plop the cookie, peanut butter side down, in the mixture. Turn, and lift with a fork to let the excess chocolate drip off. You don’t have to worry about total coverage on the bottom of the cookies as they will not be visible.
Place the coated cookies back on the parchment-lined trays, and let them set until the chocolate has firmed. Depending on the humidity and temperature of your kitchen, this can take anywhere from 30 minutes to a couple of hours.
Cook Notes
Store these cookies in a single layer, well wrapped, at room temperature for up to 3 days. Do not freeze or refrigerate.
Partner Tip
Make-ahead tip: the cookie dough can be made ahead. You can make the dough and store it in the refrigerator for up to 2 days, or in the freezer for up to 2 weeks. Let thaw before proceeding with the recipe.
Tags: Chocolate Cookies Dessert Peanut butter Peanut Butter & Co. Shortbread Smooth Operator Snack Sweet Sweets Treats Uncategorized Vegetarian

