Peanut Butter Ombré Cake
Note: There is a print link embedded within this post, please visit this post to print it.
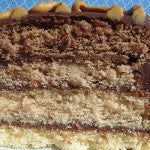
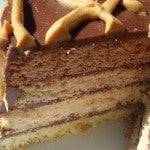
Forget 50 shades of grey. Four shades of peanut butter are far more tantalizing. Especially when they make up the layers on a delicious peanut butter ombré cake. Not only is it delicious, but you’re not going to get embarrassed if your boss or your grandma see you carrying this baby around.
To the uninitiated: ombré refers to a shaded or graduated tone of color. It’s a trend that has taken fashion by storm as clothing prints and even a hair dye method. But bakers have caught on to the trend bigtime, bringing ombré to the world of cakes and pastry.
This cake is a tasty nod to the trend, using peanut butter in various amounts and flavors to create an ombré effect. Surprisingly easy to make, this cake is rich in peanut butter flavor, and big on the “wow” factor when sliced into.
Prep time: 2 hours 40 minutes
Cook Time: 20 minutes
Total time: 3 hours (includes cooling times)
Yield: 12 servings


Ingredients
For the cakes

3 cups flour
1 tablespoon plus ½ teaspoon baking powder
½ teaspoon salt
2 cups granulated sugar
1 cup butter, softened
4 eggs
1 tablespoon vanilla extract
1 cup milk
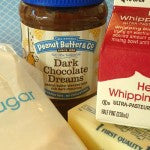
1 teaspoon Smooth Operator peanut butter (plus more to decorate, if desired)
1 ½ tablespoons White Chocolate Wonderful peanut butter
1 jar Dark Chocolate Dreams Peanut butter, divided (use 2 tablespoons for the cake, the rest of the jar for the icing)
For the icing

The remainder of the jar of Dark Chocolate Dreams (minus 2 tablespoons)
2 sticks unsalted butter, softened
2 cups confectioners’ sugar, sifted
milk or cream, to thin (optional)
Procedure
1. Preheat oven to 350°F. Grease and flour four 9×9-inch cake pans. If you don’t have four cake pans, you can wash and re-use however many you have (but be aware it’s going to take longer to bake all of the layers this way).
2. Sift the flour, baking powder, and salt together. Set to the side.
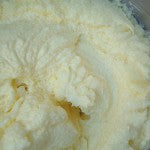
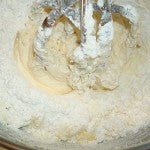
3. In the bowl of a stand mixer fitted with the paddle attachment, cream together the sugar and butter. Beat in the eggs, one at a time, pausing to scrape the bowl as needed. Stir in the vanilla.

4. Add the flour mixture alternately with the milk, in 2-3 additions. Scrape down the sides of the bowl with a rubber spatula as needed.

5. Now, divide the batter into four equal parts, in four bowls. I usually just take a big spoonful and put it in each bowl, and then continue adding more to each until I’ve divided all the batter.
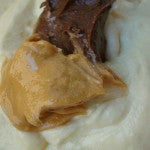
6. Grab your peanut butter. It’s time to get your color lab going. To the first bowl, stir in 1 teaspoon Smooth Operator. To the second bowl, stir in 1 tablespoon White Chocolate Wonderful. To the third bowl, stir in ½ tablespoon White Chocolate Wonderful, and ½ tablespoon Dark Chocolate Dreams. To the fourth bowl, stir in 1½ tablespoons Dark Chocolate Dreams.

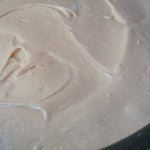
7. Now, using a separate spoon or spatula in each bowl (or cleaning in between), stir in the peanut butter until very well combined. Spoon each batter into one of the prepared cake pans. It will be a thick batter so try to spread it as evenly as you can.

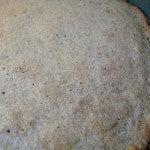
8. Bake in the preheated oven for 20 minutes, or until golden on top.

9. Remove from the oven. Run a knife along the edges of the pans, and then turn on to a parchment-lined work surface. Let cool completely before moving forward.
10. Now, go ahead and make the icing. This icing is sort of fudge-like, so it will start out rather liquid-like, but will “set” firm. In a large saucepan over low heat, melt 2 sticks of butter. Once completely melted and smooth, remove from heat.
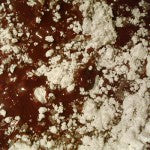
11. Stir in the sifted confectioners’ sugar. Don’t make me tell you twice to sift it. It will be lumpy if you don’t! Stir until completely combined and smooth. If it’s on the thick side, stir in some milk or cream 1 tablespoon at a time until it is a consistency that is very thick, but you feel as if you could pour it.

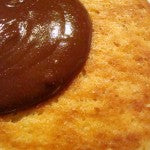
12. Now, it’s time to assemble the cake. Start with either the lightest or darkest layer. I started light, so the instructions will be listed in that way. Place the layer on top of a cardboard circle (this will make transferring your cake easier when it’s done) or on to the serving dish you’ll use. Pour ⅓ cup of icing on top of the layer, and use the back of a spoon or a spatula to gently spread it across the surface in a thin layer. You don’t have to go completely to the edge, as the weight of the cake placed on top will spread the icing a little bit. You can add a touch more if you don’t think it’s covering the layer well.

13. Put the next-darkest colored cake on top, and repeat with the ⅓ cup icing and spreading. Put the third darkest colored cake on top, and repeat with the ⅓ cup icing and spreading. Put the darkest cake layer on top of this. Make sure everything is evenly stacked and flush. If your cakes seem to be moving or shifting, inserting a skewer in the cake can help them stay put, but don’t forget to remove it before you serve someone a slice.
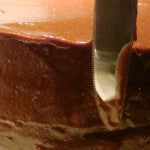
14. Now what you’re going to do is spoon the rest of the icing on top of the cake, bit by bit, and ice the sides of the cake by “guiding” the icing from the top of the cake down the sides. It’s easiest to do this if you add the icing ⅓ cup or so at a time to the top of the cake, and then just smooth it down the sides. If the icing starts to get too firm, put it back over low heat for a minute or two, stirring frequently. This should make it nice and workable again.

15. Continue until you’ve iced the entire cake. Let the cake sit until the icing sets.

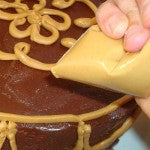
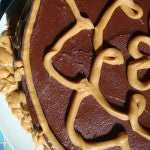
16. At this point, I had an inspiration I’d like to share with you. As it turns out, Smooth Operator peanut butter is perfect for piping! Should you want a fun decorating method, take a ziploc bag and spoon about ½ cup of Smooth Operator peanut butter inside. Cut off the tip of the corner of the bag, and use it to “draw” whatever designs you’d like on the cake. I did some freehand work.


17. Use a large serrated knife to slice the cake. Clean the knife between cuts. Store leftovers, well covered, in the fridge or at room temperature. If chilling, let the cake come to room temperature before serving for the best flavor.


PEANUT BUTTER GIVEAWAY
What other desserts would you think about adding an ombré effect to?
Leave a comment below with your answer to enter for a chance at winning a jar of Smooth Operator, Dark Chocolate Dreams, and White Chocolate Wonderful, the peanut butters used in this recipe.
DETAILS:
– The giveaway is open to USA residents only and will run until Monday, June 30, 2014 at 11:59 PM EST.
– One entry per person.
– Winner(s) will be generated via a random number generator and notified via the contact email provided on the comment form.
– Winner(s) will have until 07/03/14 to claim their prize or we will choose another winner.
– Winner will win one jar each of Smooth Operator, Dark Chocolate Dreams, and White Chocolate Wonderful peanut butter. Product will be shipped by Peanut Butter & Co.
– No purchase necessary. Void where prohibited by law. Must be 18 years of age to enter. See Official Giveaway Rules.
The post Peanut Butter Ombré Cake appeared first on - Peanut Butter & Co. Recipe Blog.
Tags: Cake Chocolate Dark Chocolate Dreams Dessert Frosting Peanut butter Peanut Butter & Co. Smooth Operator Snack Sweet Sweets Treats Uncategorized White Chocolate Wonderful